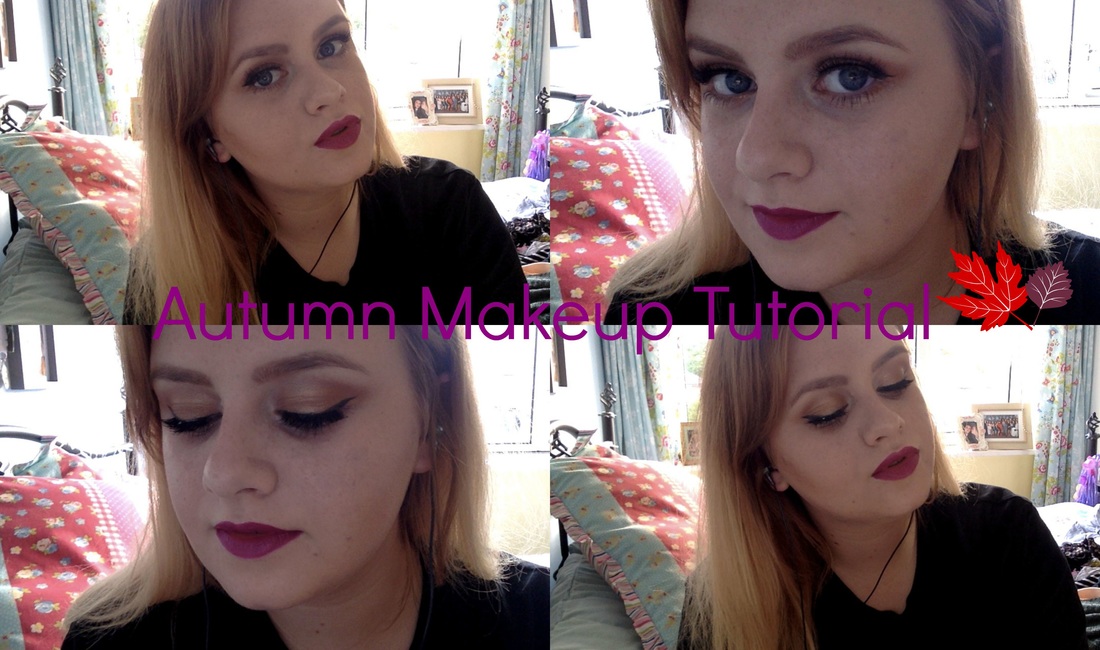
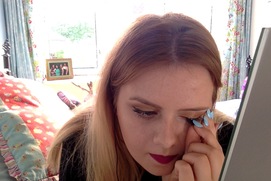
So Autumn is my favourite time of the year mainly because of the colours, the fashion and the makeup that goes along with it. So because i am so excited that i am finally allowed to wear dark lipsticks, darker eye makeup and paler skin i decided to do a tutorial on my everyday autumnal makeup. I am going to explain how i apply the makeup and where i apply it and then ill write the best products for this as i know if anyone tries this tutorial they won't go out and buy all the products they will use what they already own. So this is very open to the interpretation of your own makeup collection.
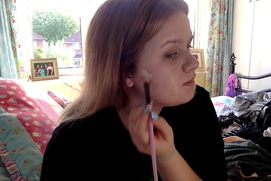
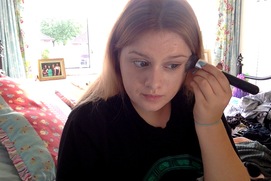
First of all i prime my skin, putting the primer all over my skin making sure i don't apply it heavily because my skin is quite oily already and excessive primer could make it worse. I then add a solid concealer to my blemishes and spots and then blend those in slightly with the foundation brush that i will later use for my face.
Primer- Maybelline New York Baby skin primer.
Concealer- Rimmel Lasting Finish Concealer.
Primer- Maybelline New York Baby skin primer.
Concealer- Rimmel Lasting Finish Concealer.
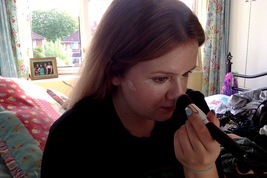
Once i have blended in the concealer i put on my foundation. Just applying the foundation is small amounts on my brush and applying to my face, allowing the perfect amount to be applied. Make sure you blend the foundation into your neck and hair line especially if it is a shade darker or lighter than your skin tone.
Foundation- Rimmel Wake Me Up in Ivory.
Foundation- Rimmel Wake Me Up in Ivory.
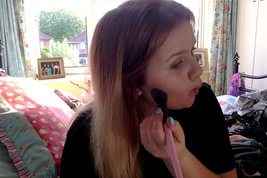
Once everything is blended and applied properly i start on my bronzer. Because it's autumn i don't apply bronzer to my whole face because pale is finally acceptable. I apply a thin layer on bronzer to the outline of my face and jaw line using an angled powder brush. Sucking in my cheeks i then apply the bronzer underneath my cheek bones. Using a different bronzer, a slightly darker one i then go over my cheek bones to define my face more without making it look too contoured and obvious. Using a slightly pink highlighter i then apply this above the bronzer.
first bronzer- Half Baked Bronzer.
second bronzer- St.Tropez Bronzer.
first bronzer- Half Baked Bronzer.
second bronzer- St.Tropez Bronzer.
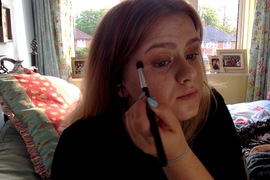
On to the most important part, The eyebrows. For this just take the natural shape of your eyebrows and either use a powder the same shade of your brows or hair and apply to the hair. Then take the powder over areas where there are bald spots or where you want to make your brows bigger or longer. For this i use Soap and Glory Archery because it allows me to easily darken my brows, shape them and fill in bald spots with the hair line effect pen.
Brows- Soap and Glory Archery in brown.
Brows- Soap and Glory Archery in brown.
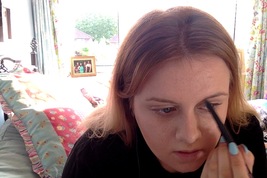
For my eyes i use a brunt orange colour on the whole lid and crease, building it up so its quiet dark. Adding a light brown colour on the inner lid and inner eye area, blending it into the orange. Using a darker orange/ brown i add that to the crease very slightly to make the outer eye more defined. Adding a slight bit of cream shadow under my brow bone to highlight my brows.
whole lid eyeshadow- Heaven and Earth MUA palette.
inner eye-MUA Undressed palette.
crease-Heaven and Earth palette.
brow bone- Heaven an Earth palette.
whole lid eyeshadow- Heaven and Earth MUA palette.
inner eye-MUA Undressed palette.
crease-Heaven and Earth palette.
brow bone- Heaven an Earth palette.
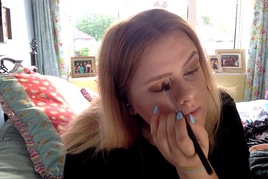
then blend all the colours in with clean eye brush. Then i use the burnt orange that i used on the whole lid and run it under my eye bringing the whole eye together.
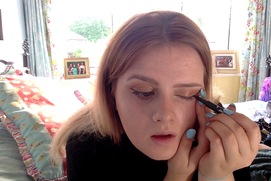
I then added a thin line or eyeliner across my eye, right from the inner eye and winging it out slightly past the eye socked bone.
This will take its time to make them look as similar as possible but don't let it stress you out!!
eyeliner- Soap and Glory eyeliner.
This will take its time to make them look as similar as possible but don't let it stress you out!!
eyeliner- Soap and Glory eyeliner.
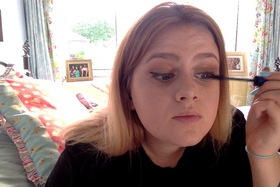
I then added mascara to my eyelashes, including my lower lashes. Nothing to really explain here because its pretty obvious how to apply mascara.
mascara- MAC False Lash Waterproof.
mascara- MAC False Lash Waterproof.
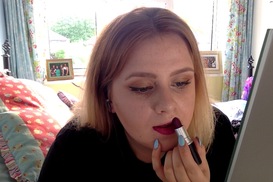
For my favourite bit i added my purple lipstick. Take your time with this, rushing could end up in messy outline. If you aren't used to using dark lipsticks or any lipsticks then use a lip liner to help you apply more neatly.
lipstick- MAC Rebel/Diva works well too. (MUA do a great dupe of this shade 3)
lip liners- MAC/ MUA lip liners in purple or diva.
lipstick- MAC Rebel/Diva works well too. (MUA do a great dupe of this shade 3)
lip liners- MAC/ MUA lip liners in purple or diva.
Now i would normally leave it there but for those who love wearing lashes then i have added doe lashes that you could use. For nights out this look is great too so i would use lashes then too. I took my lashes and trimmed them to the length matching my lids and then i added a thin layer or hair extension glue ( i know, i know. But it sticks to the lid better,stay on longer, goes invisible and is easy to take the lashes off) and then put the lash on the middle of my lid then push the ends onto the lid as close to my lash line as possible.
lashes- Ebay. ( http://www.ebay.co.uk/itm/10Pairs-Makeup-Handmade-Natural-Fashion-Long-False-Eyelashes-Eye-Lashes-252A-/280932011251?hash=item4168da4cf3 )
lashes- Ebay. ( http://www.ebay.co.uk/itm/10Pairs-Makeup-Handmade-Natural-Fashion-Long-False-Eyelashes-Eye-Lashes-252A-/280932011251?hash=item4168da4cf3 )
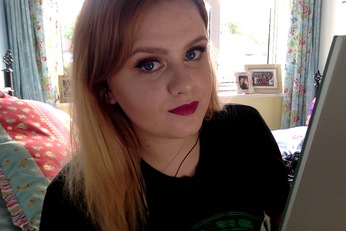
There is my finished autumnal makeup look. I really love this look and am so happy i can wear purple lipstick again! More makeup tutorials coming up soon, i forgot how much i love doing them! Comment below on what you want me to write about next and what you've enjoyed so far!
Thanks for reading.
Follow my blog and photography instagram page @focusonbeauty for more updates. Thankyou again.
Thanks for reading.
Follow my blog and photography instagram page @focusonbeauty for more updates. Thankyou again.